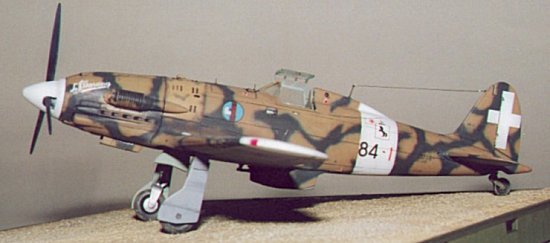
Italeri kit is an excellent one, which requires only few corrections and little extra work to have a nice replica of the real thing.
Construction
I decided to build my two Macchis with a "parallel construction"
procedure. As usual, I started with the interiors: in 1:72 scale
the cockpit panel represented by a decal supplied with the kit is
quite good, and the cockpit needs only few corrections (mainly
the seat, too thick and wrong in shape) and details to look
realistic, such as the oxygen bottle, the televel device for fuel
level reading and side consoles, all taking very little effort
and time to be scratch-built.
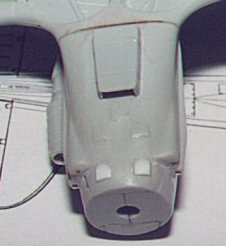
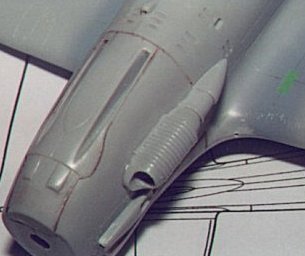
The undernose needs to be reshaped to match the diameter of the
spinner and two small air intakes have to be added to the lower
engine cowling; the upper cowling, which is a separate piece in
the kit, must be glued, sanded and rescribed because of its poor
fit, such as the wing - fuselage joints.
Nonetheless, the job was done quite quickly, since I used
superglue to cement all the parts (I used it as a filler too) and
the kit is made of an easy-to-work soft grey polystyrene
plastic.
The entire outer surface of the model must then be sanded to
reduce the heavily raised rivets, the wing trailing edges and the
fabric covered movable surfaces.
Painting and decals
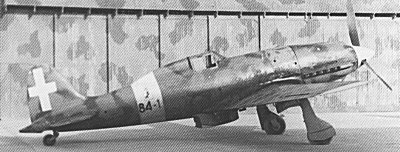
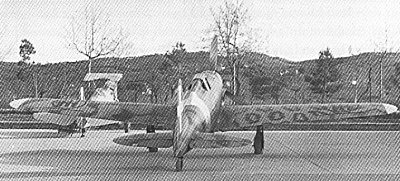
The first sample I choose is amongst the most fascinating Italian
subjects I have ever seen, since on the same aircraft at least 4
different painting schemes can be observed. This peculiar bird is
serial MM 7720, an AerMacchi built series III aircraft, coded 84-1,
belonging to 84° Squadriglia, 10° Gruppo, 4° Stormo,
based at Fuka in November 1942 and often flown by Capitano Franco Lucchini, one of the major Italian aces
of WW2, credited with at
least 21 confirmed kills at the time of his death, being KIA on
5/7/1943.
MM 7720 was originally
delivered in an overall Verde Oliva Scuro "continental" scheme,
on which large patches of Giallo Mimetico
4 were subsequently applied, almost certainly "on the field". The
starboard wing was a replacement cannibalised from another
aircraft, and wears a typical Macchi
factory scheme, with Verde Oliva Scuro "smoke rings" on a Nocciola Chiaro 4 base, but its elevator
apparently is painted in a Breda factory
mottle scheme with the same colours. Further to that, the upper
engine cowling probably carries another Breda scheme, consisting
of small dark green mottles over an unidentified Giallo Mimetico base. Wingtips, fuselage band
and tail crosses (that do not carry the Savoy coat-of-arms) are
snow white.
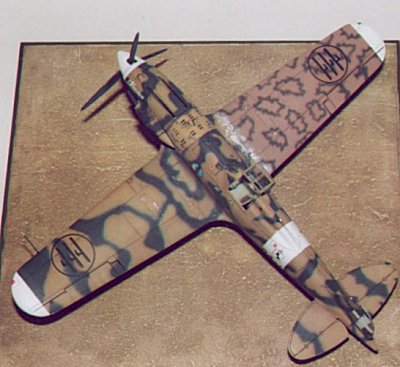
The model was airbrushed freehand with mixtures of Tamiya
gloss acrylics (no need of a gloss clear pass before applying
decals), recessed and raised panel lines are highlighted by a
wash of Mo-Lak acrylics thinned with ox gall, followed by a
protective coat of Model Master Dullcote. Unit numerals and
stencils are computer made, printed with a laser printer on a
transparent decal sheet, the "4° Baracca" motto comes from a 30 years old ESCI
sheet, all other decals come from the Italeri kit.

The second sample was photographed at Brindisi airfield in mid
September 1943, only a few days after the armistice. Its unit and
serial number remain unknown, but it is surely of Breda construction, series XI or XII (I
represented it as a series XII, the kit offers the option for the
correct tailplanes), and wears a late war camouflage scheme made
of thick Verde Oliva Scuro mottles over a Nocciola Chiaro undercoat, which gives the
aircraft a very dark appearance.
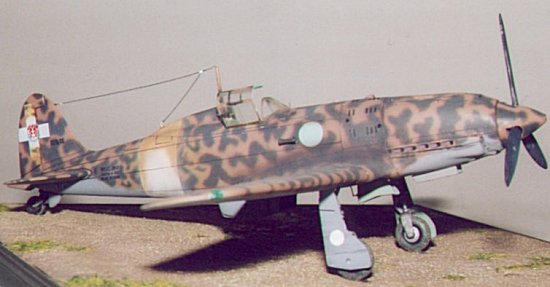
In conformity with the directives issued by the Italian government after the 25th of July, 1943, all fascist markings were deleted on every Regia Aeronautica aircraft: curiously on this Macchi the obliteration of the fuselage fasces, which were a decal, has very sharp edges, so we could think that they were simply removed, showing the Verde Anticorrosione primer. Also unit markings and numerals were cancelled, and the white tail cross (still carrying the Savoy badge) was partially overpainted, such as the white fuselage band. A small white disc is also visible on the starboard undercarriage door.
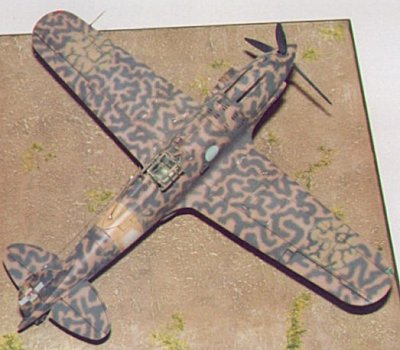
The painting procedure is the same as in the previous model (to be honest, with much more time and patience spent in the never-ending mottles!), stencils are computer made and printed on a transparent sheet.